You’ll need a .p12 file to publish your app on the Apple App Store, but the process can be a little confusing. So, here’s Calvium’s step-by-step guide on how to make a p12 file.
The .p12 file contains a certificate that is used to prove that the app comes from you.
Requirements
You’ll need a few things before getting started:
- Access to a Mac computer
NOTE: This is a requirement from Apple - An Apple Developer account (https://developer.apple.com)
- You’ll need your email address and “common name” for this process (e.g. “jo_smith@company.com”, “Jo Smith”)
- If you’re not sure of your common name, log in to your Apple Developer account and use the name that appears at the top right
The Process
Creating a p12 file can be a little confusing the first time, as you need to use often unnoticed pieces of software on your computer, as well as the Apple Developer web interface (which has got better in recent years).
We’ve broken the process into three steps below, which should help through the process:
STEP 1: Create a “.certSigningRequest” (CSR) file
- Open Keychain Access on your Mac (found in Applications/Utilities)
- In the toolbar, open Keychain Access > Certificate Assistant > Request a Certificate From a Certificate Authority

- Enter the email address and common name that you used to register in the iOS Developer Program
NOTE: Common name should be the name of the developer as it appears in your Apple Developer Account - Leave the CA Email blank and make sure “Saved to disk” is selected
- Click Continue
- Choose a filename & destination on your hard drive
(e.g. “CertificateSigningRequest.certSigningRequest”) - Click Save
- This will create and save your certSigningRequest file (CSR) to your hard drive. A public and private key will also be created in Keychain Access with the Common Name you entered earlier (e.g. Jo Smith)

STEP 2: Create the “.cer” file in your iOS Developer Account
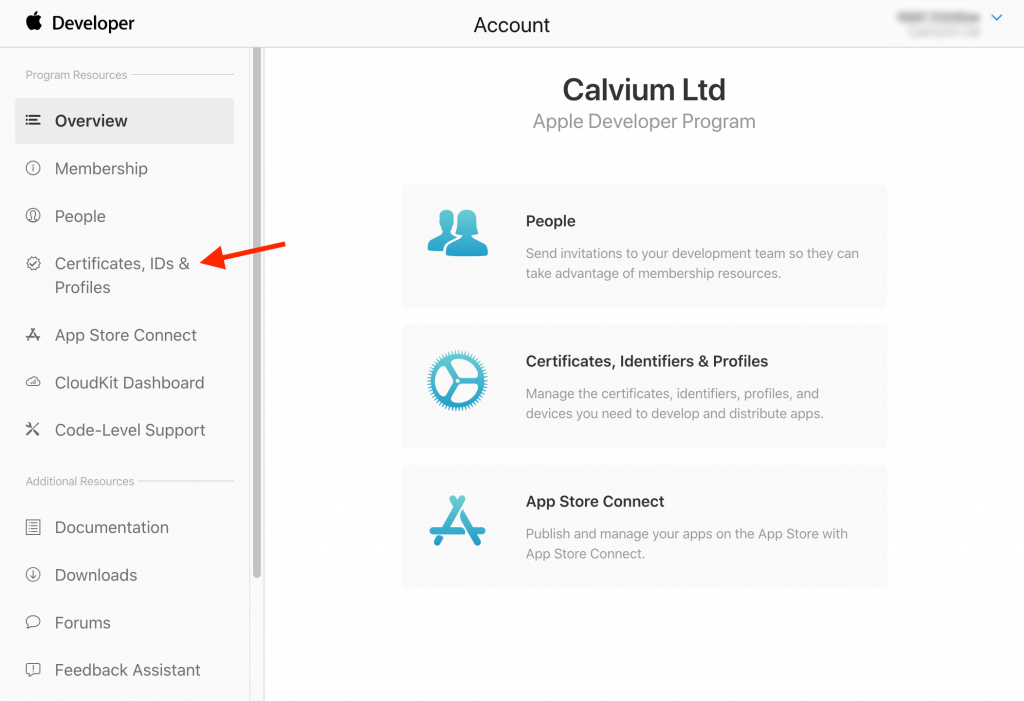
- Log on to https://developer.apple.com
- Click “Certificates, IDs & Profiles”
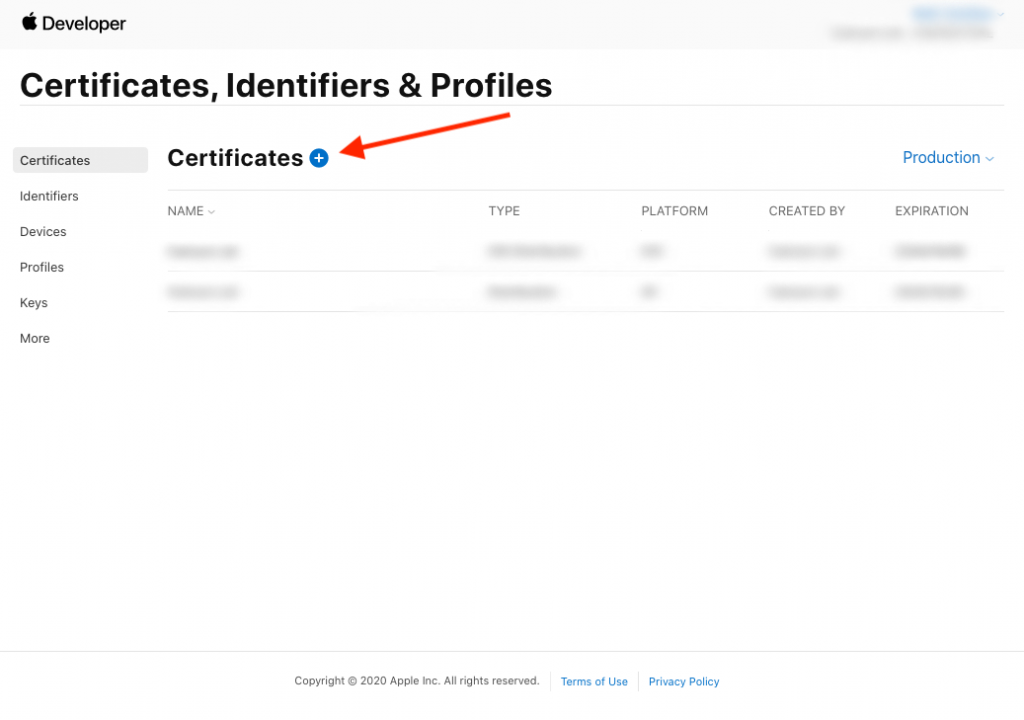
- Click the Add (+) button
- Choose “iOS Distribution (App Store and Ad Hoc) and press “Continue”
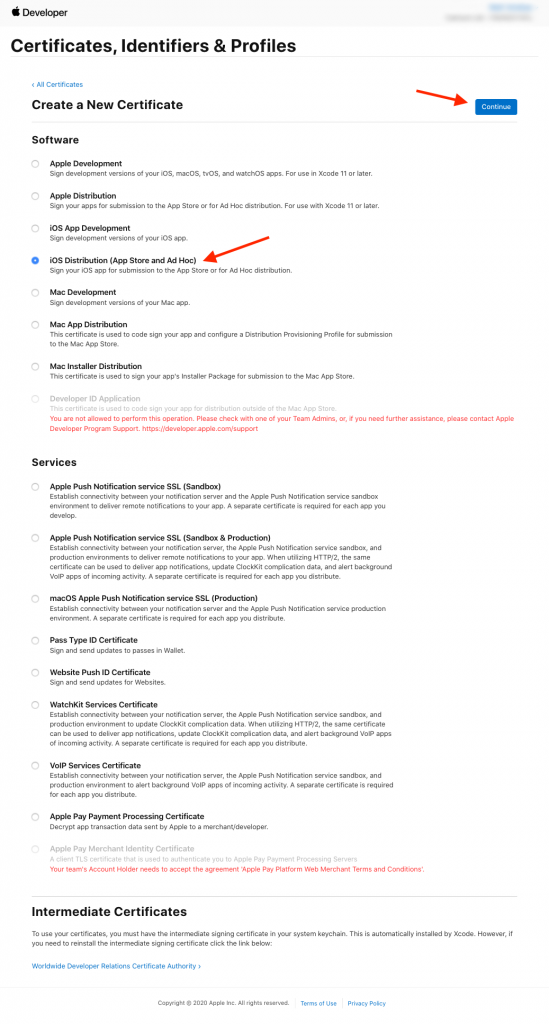
- Select the CSR file you created previously and press “Continue”.

- Press download

-
STEP 3: Install the .cer and generate the .p12
- Find the .cer file you’ve just downloaded and double-click. If the certificate hasn’t automatically been installed, you will see the following (otherwise, skip the next two steps):

- Make sure the drop-down is set to “login”
- Click Add
- Open up KeyChain Access again
- Find the two profiles you created in Step 1

- You should now be able to expand the “private key” profile, which should show the certificate you just added
- Select only these two items (not the public key), by holding SHIFT and clicking both items, then right click and click “Export 2 items…” from the popup

- In the next window, make sure the file format is a “.p12” and choose a filename and destination on your hard drive
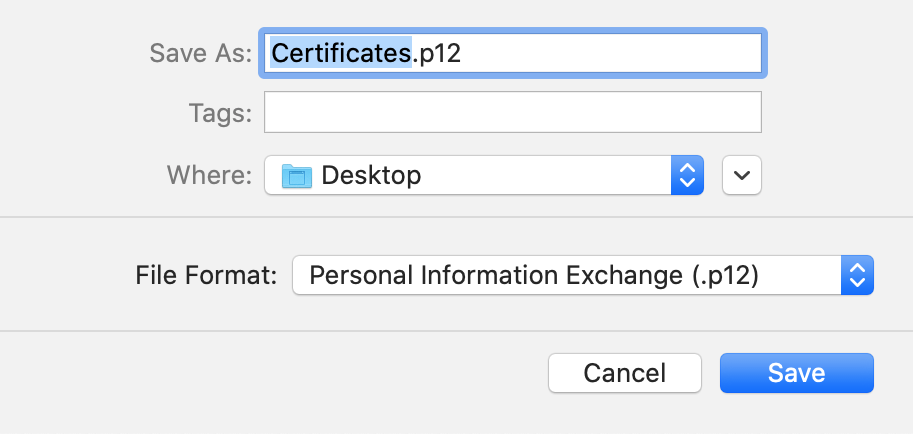
- Click Save
- Finally, you’ll be prompted to set a password – you can leave these both blank if you desire.
That’s it! We hope that helps make the publishing process on the Apple App Store a little easier for you.Find out how to make a .mobileprovision file next.